Coinsnap for Paid Memberships Pro payment plugin
If you sell restricted content and manage membership subscriptions with recurring payments based on Paid Memberships Pro for WordPress, then you can easily integrate payment processing via Bitcoin and Lightning with the Coinsnap plugin.
Simply install the Coinsnap for Paid Memberships Pro plugin, connect it to your Coinsnap account and your customers can pay with Bitcoin and Lightning.
Incoming Bitcoin payments are forwarded directly and credited to your Lightning Wallet.
Paid Memberships Pro Demo Store
If you would like to try out for yourself how you can receive Bitcoin and Lightning payments with a Paid Memberships Pro Store, visit our Paid Memberships Pro Demo Store at this link.
Install the Coinsnap Paid Memberships Pro plugin via Github
Access the Paid Memberships Pro plugin by visiting our GitHub page via the following link.
Obtain the plugin by clicking on the green “Clone or download” button and selecting “Download ZIP” from the drop-down menu.
After you have downloaded the ZIP file from the Github page, log in to your WordPress admin.

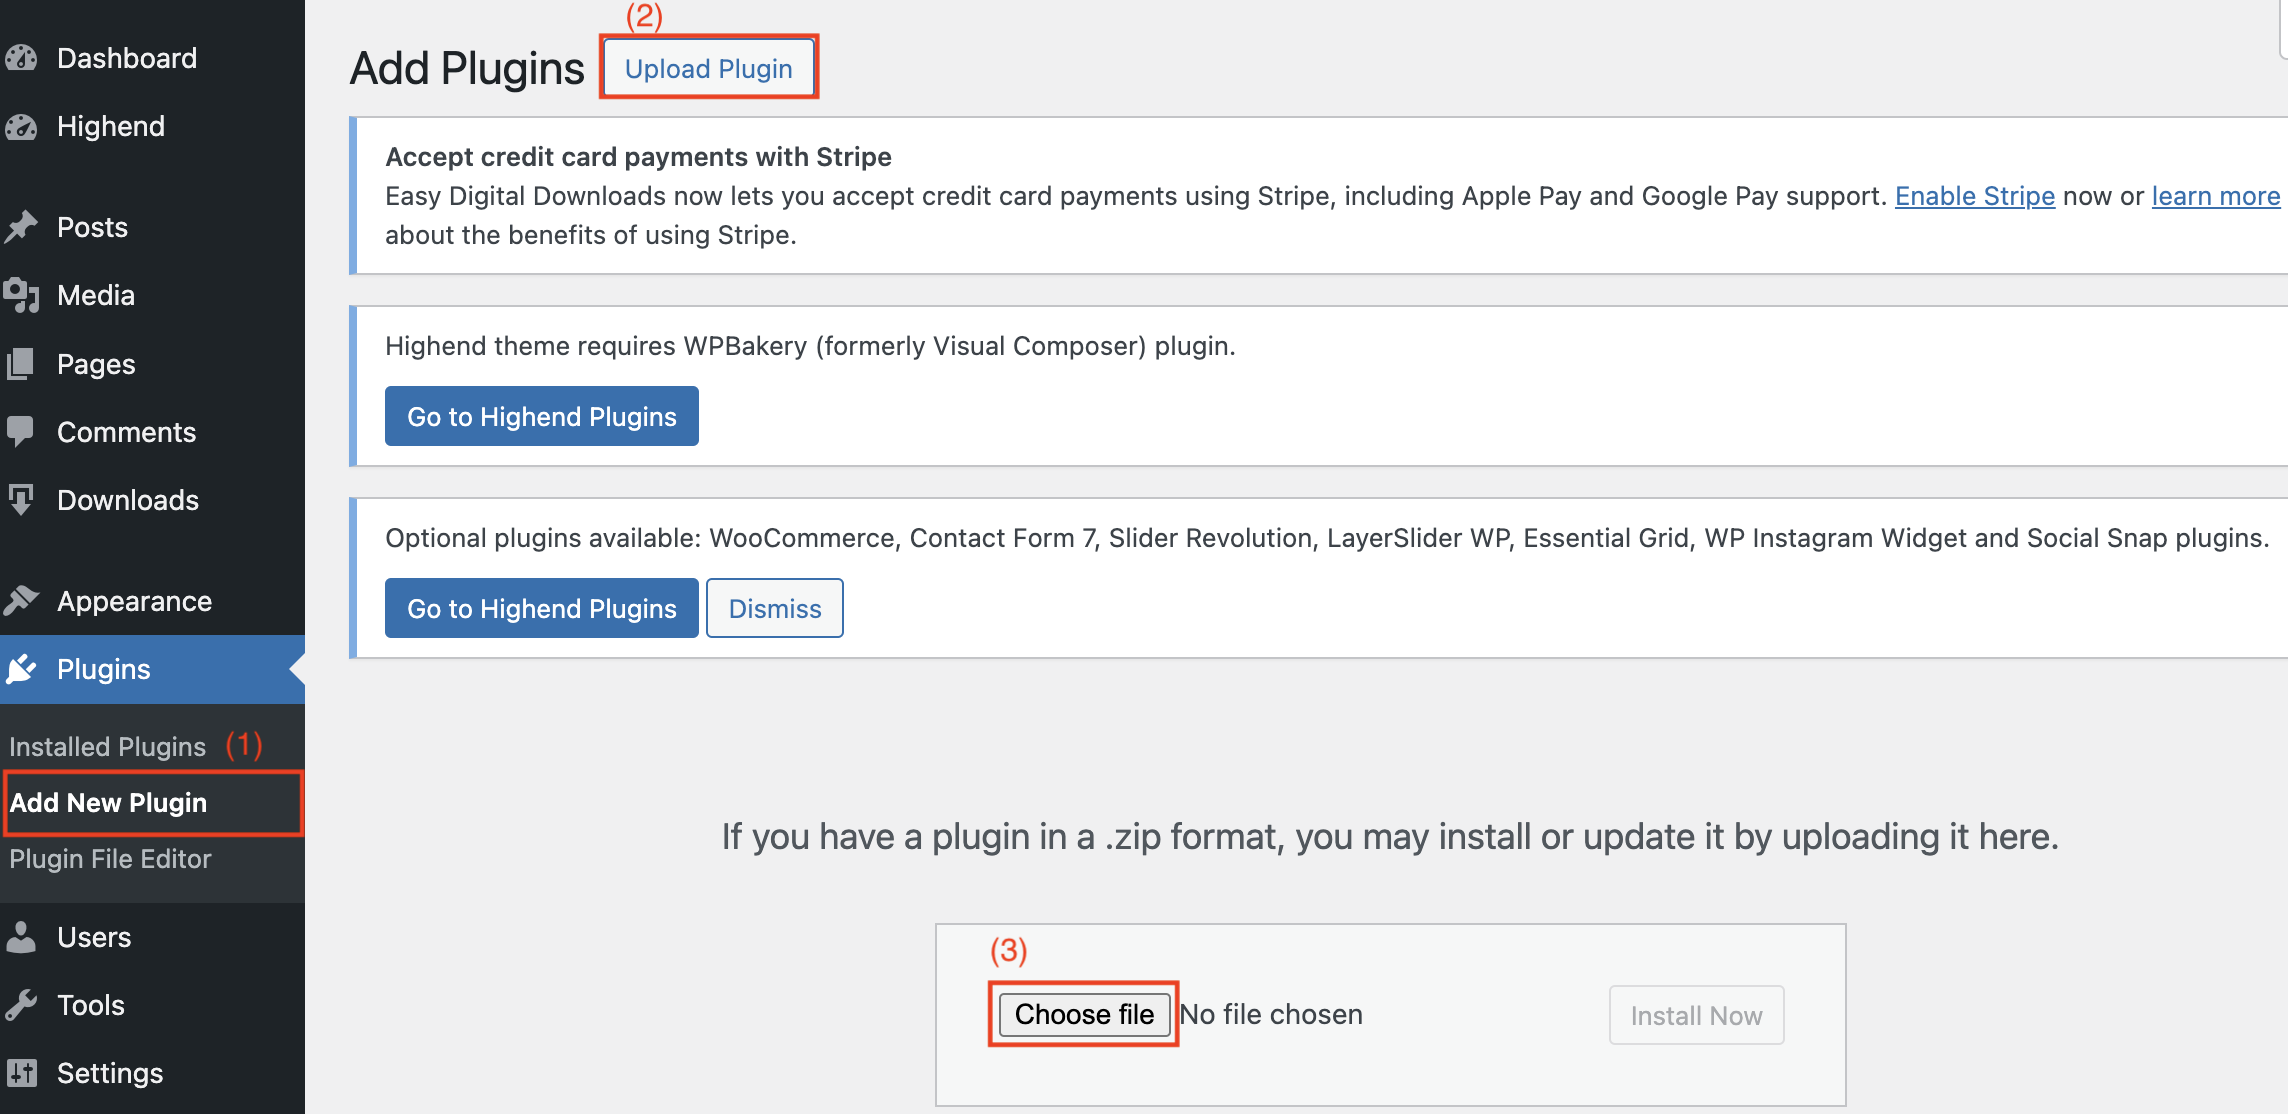
(1) Access to the plugin area
On the WordPress login page, you will find the “Plugin” section on the left-hand side.
Navigate to the “Add New Plugin” subsection.
Click on the “Upload file” button to start the process.
To do this, you need to upload the ZIP file that you previously received from our GitHub page.
(3) Select and upload ZIP file
Select the “Select file” option and select the ZIP file from your computer.
This step ensures seamless integration of the plugin into your WordPress environment.
(1) Open the “Memberships” section
Find the “Memberships” section on the left-hand side of the WordPress login page and go to the “Settings” subsection.
Within the “Settings” subsection on the right-hand side, search for the “Payment Gateway & SSL” section and open it.
Click on it to continue with the configuration.
Scroll down and select Coinsnap.
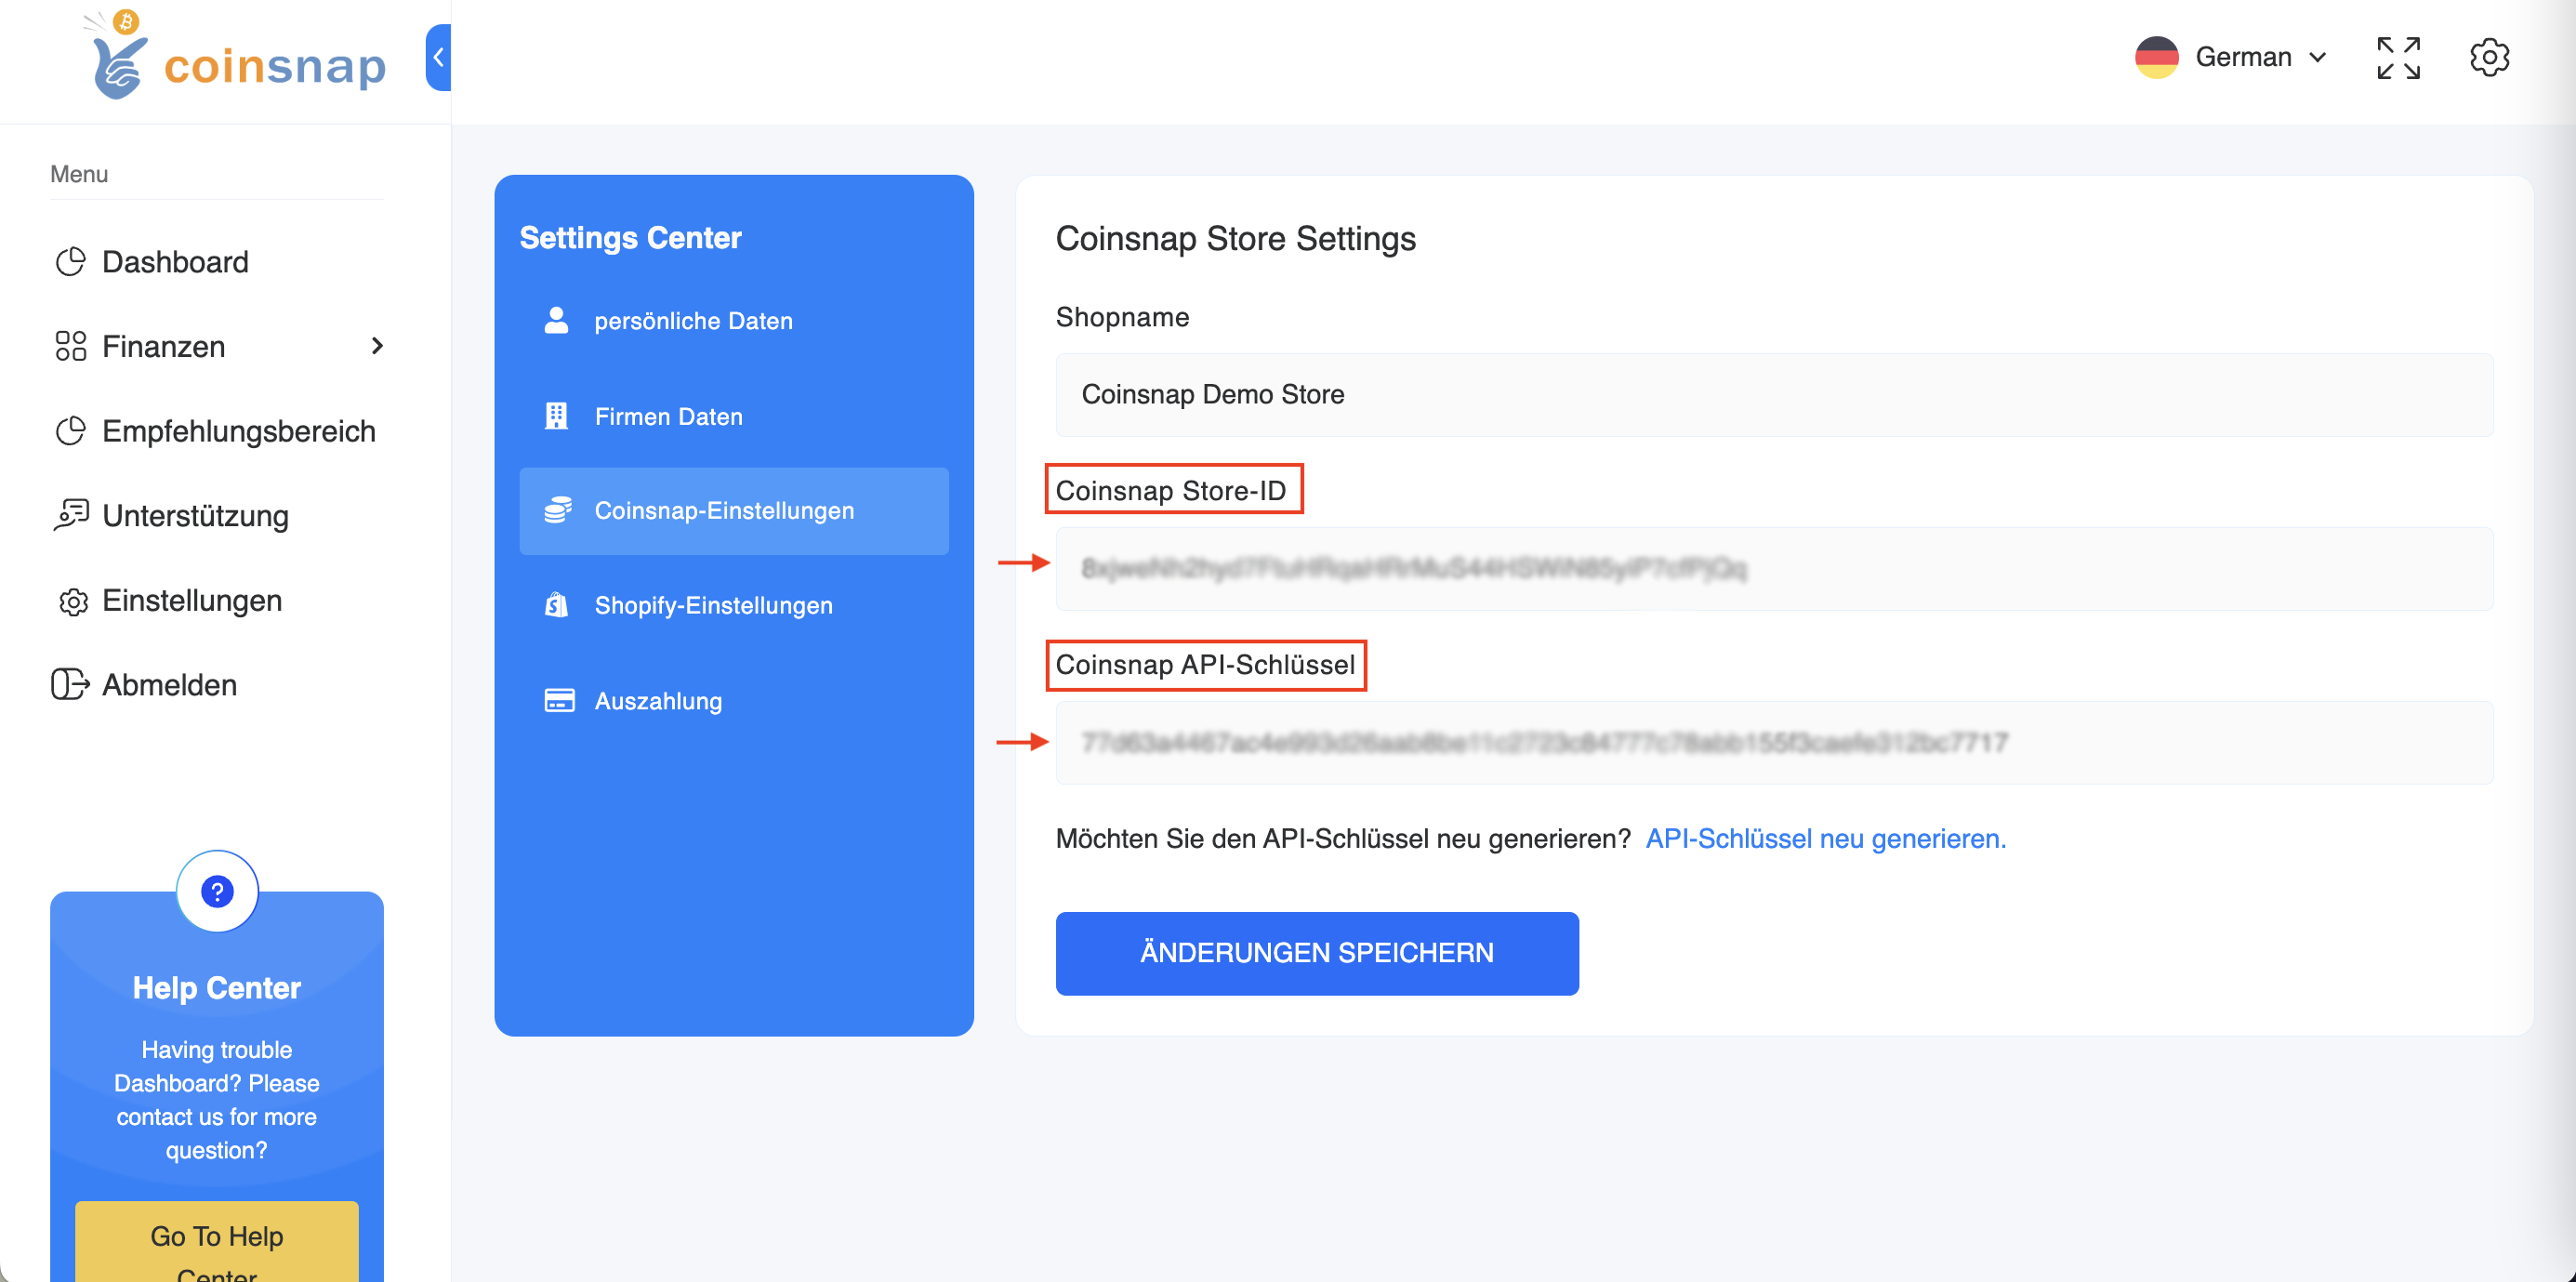
(1) Enter Shop-ID
Retrieve the store ID from the previously copied information within the Coinsnap app.
Enter this information in the first field provided.
(2) Enter API key
Get the API key from the information previously copied into the Coinsnap app.
Enter this information in the second field provided.
Make sure to synchronise the invoice statuses for “Expired”, “Billed” and “In Progress” to maintain accurate and up-to-date records.
(1) Currency and tax configuration
Select the desired currency from the available list.
Please note that Coinsnap does not currently support the following currencies: “EUR”, “USD”, “CAD”, “JPY”, “GBP” and “CHF”.
(2) Confirm the changes
To apply and save all changes, click on the blue button at the end of the process.
You have successfully completed the integration with the Coinsnap app!

