Coinsnap for Shopify
If you operate a Shopify-based online store, integrating Bitcoin and Lightning payment methods is simple with the Coinsnap Shopify app.
Simply install the Coinsnap for Shopify plugin, link it to your Coinsnap account and your customers can pay with Bitcoin and Lightning.
All incoming Bitcoin transactions are immediately forwarded to your Lightning Wallet and credited.

Once you’ve registered with Coinsnap and provided your Lightning address, you can begin the Coinsnap setup on Shopify.
This comprehensive guide, accompanied by photos, will walk you through the complete process of linking the Coinsnap app with Shopify.
Instead of integrating Coinsnap into Shopify yourself, you can also use the free Shopify Integration Service.
You can find more information on this in the article: Shopify Integration Service.
This is what the payment process looks like from the payer’s perspective: https://coinsnap.org/en/wie-man-bitcoin-in-shopify-akzeptiert/
Shopify Demo Store
If you want to try out for yourself how you can receive Bitcoin and Lightning payments with a Shopify Store, visit our Shopify Demo Store at this link.
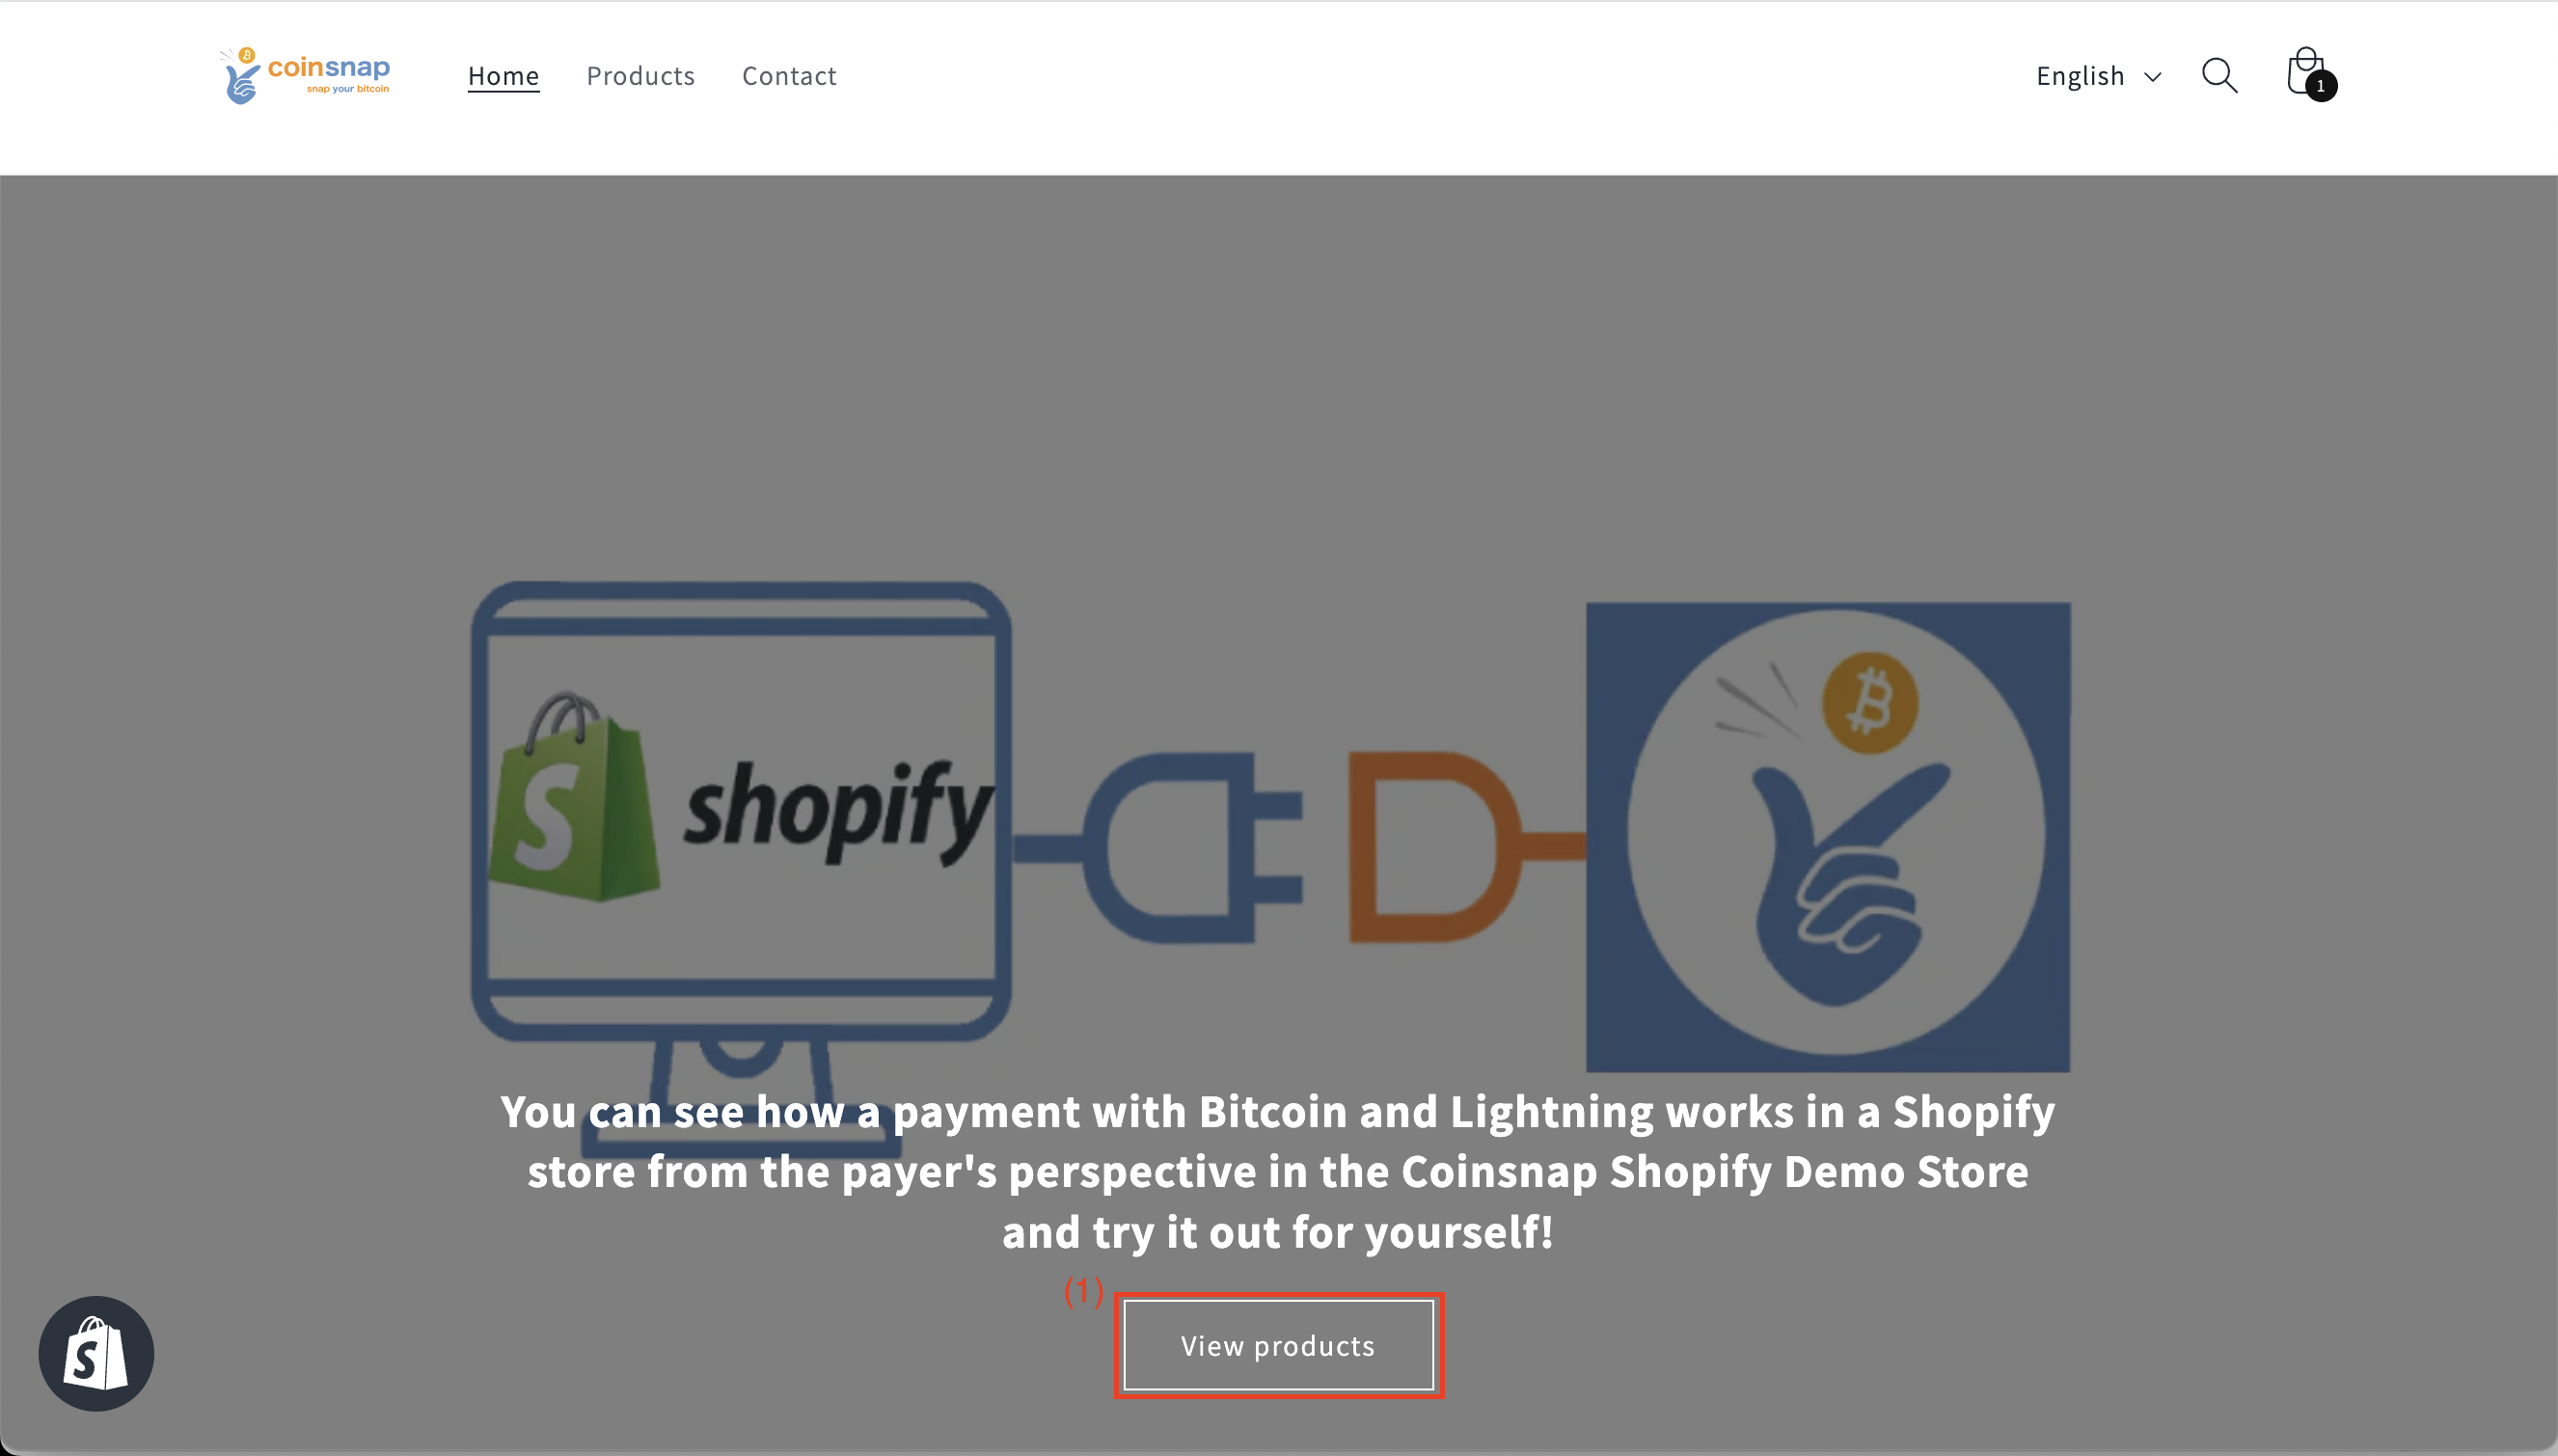
(1) Show all products
Once you have opened the page of our demo shop, click on “View products”. You will then be redirected to our product page where you can select the Coinsnap T-shirt test product.
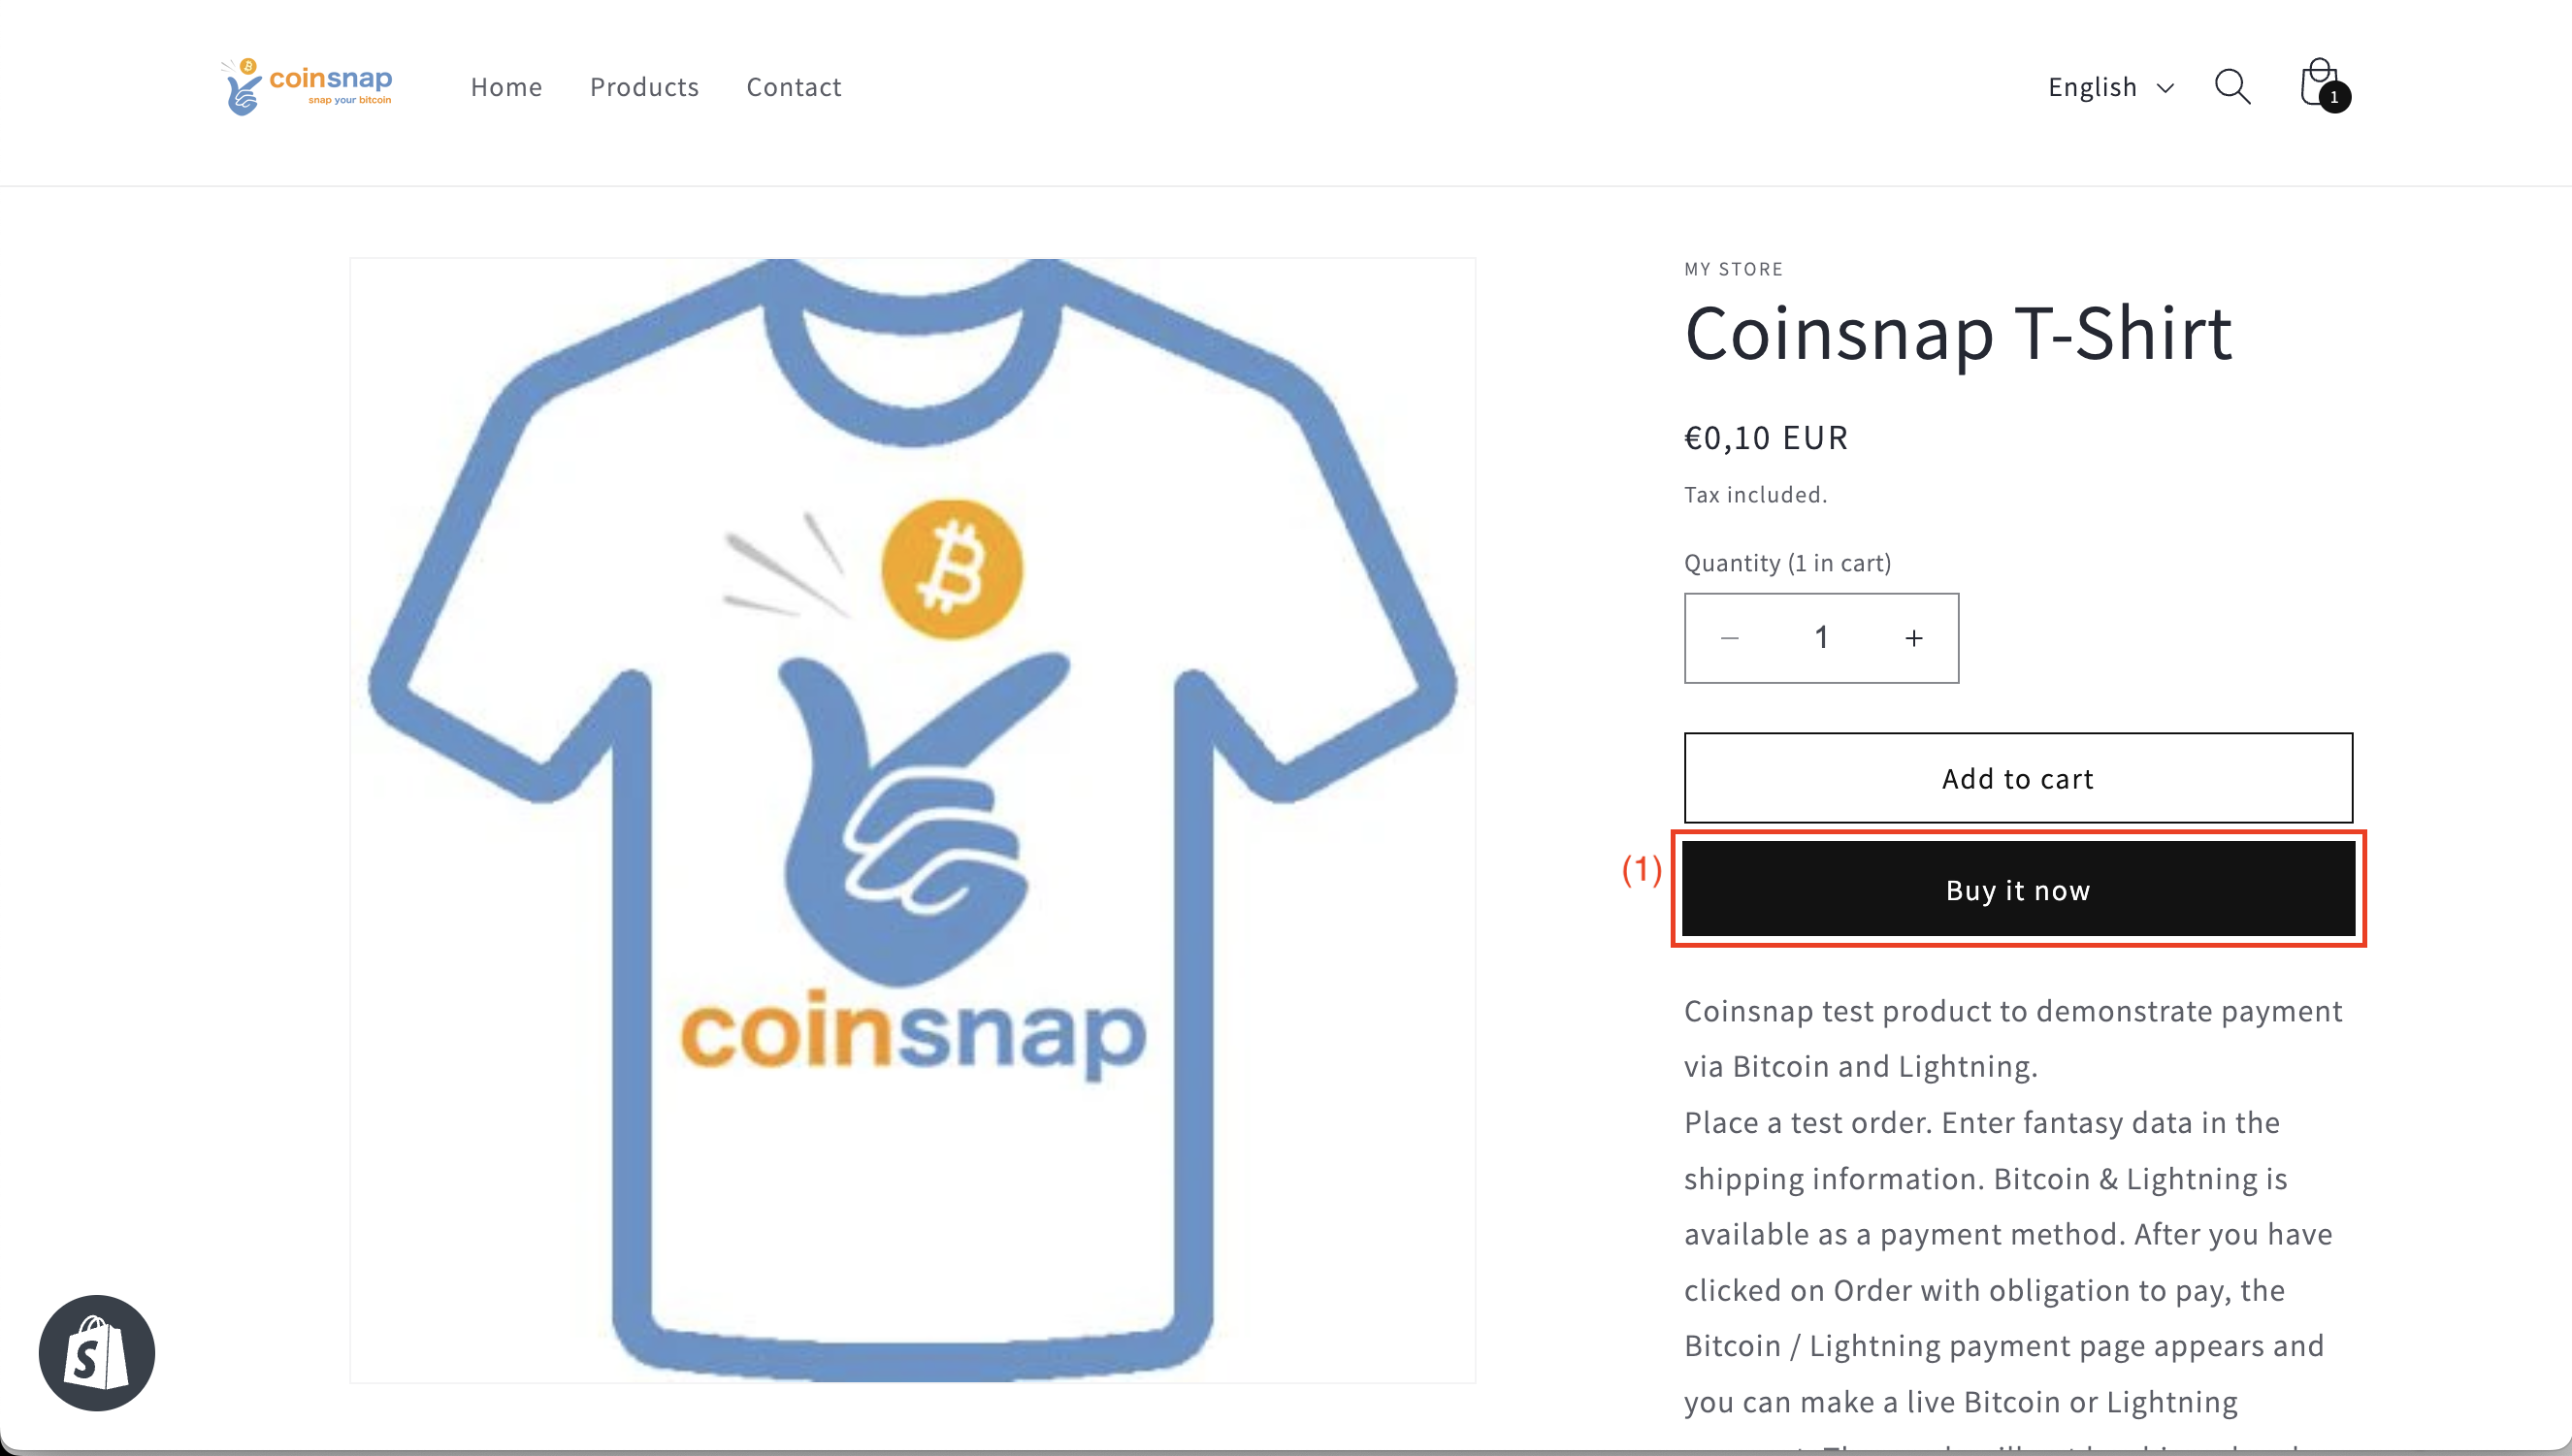
(1) Buy now
Click on the “Buy now” button to start the payment test.
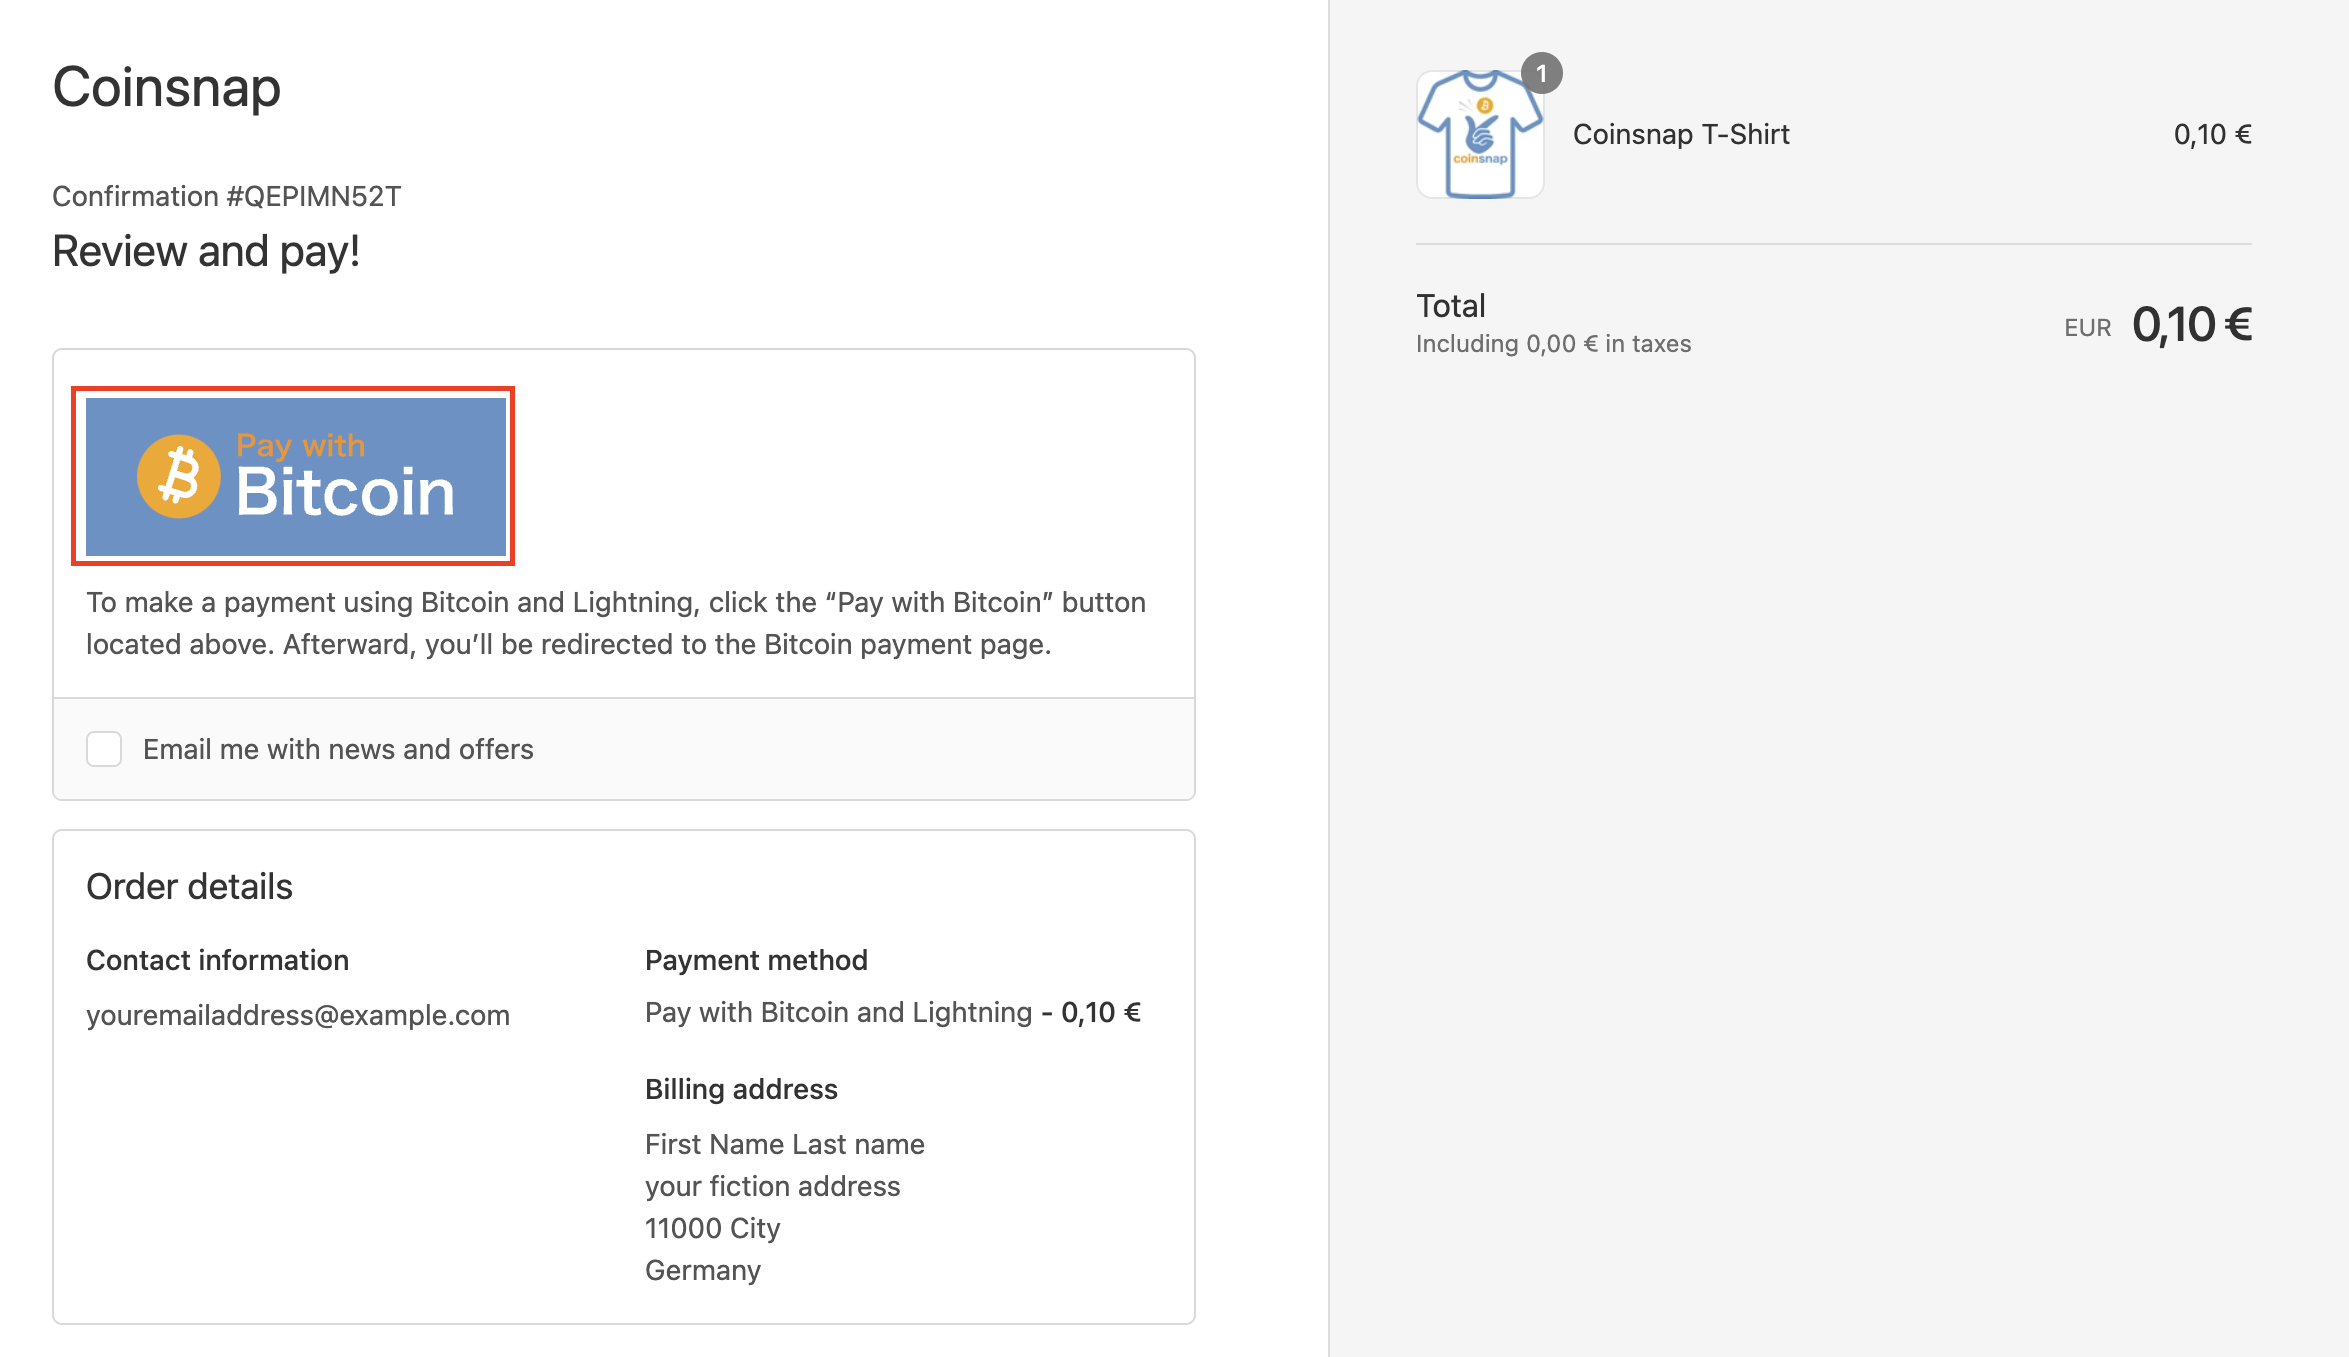
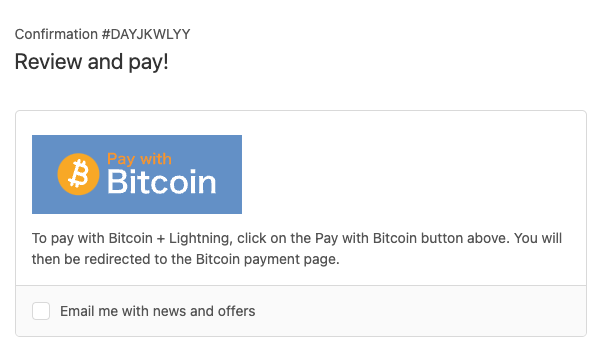
After you have filled in the form with your access data, you will see an overview of your order and the confirmation, which shows you the “Pay with Bitcoin” button.
Click on it to continue!
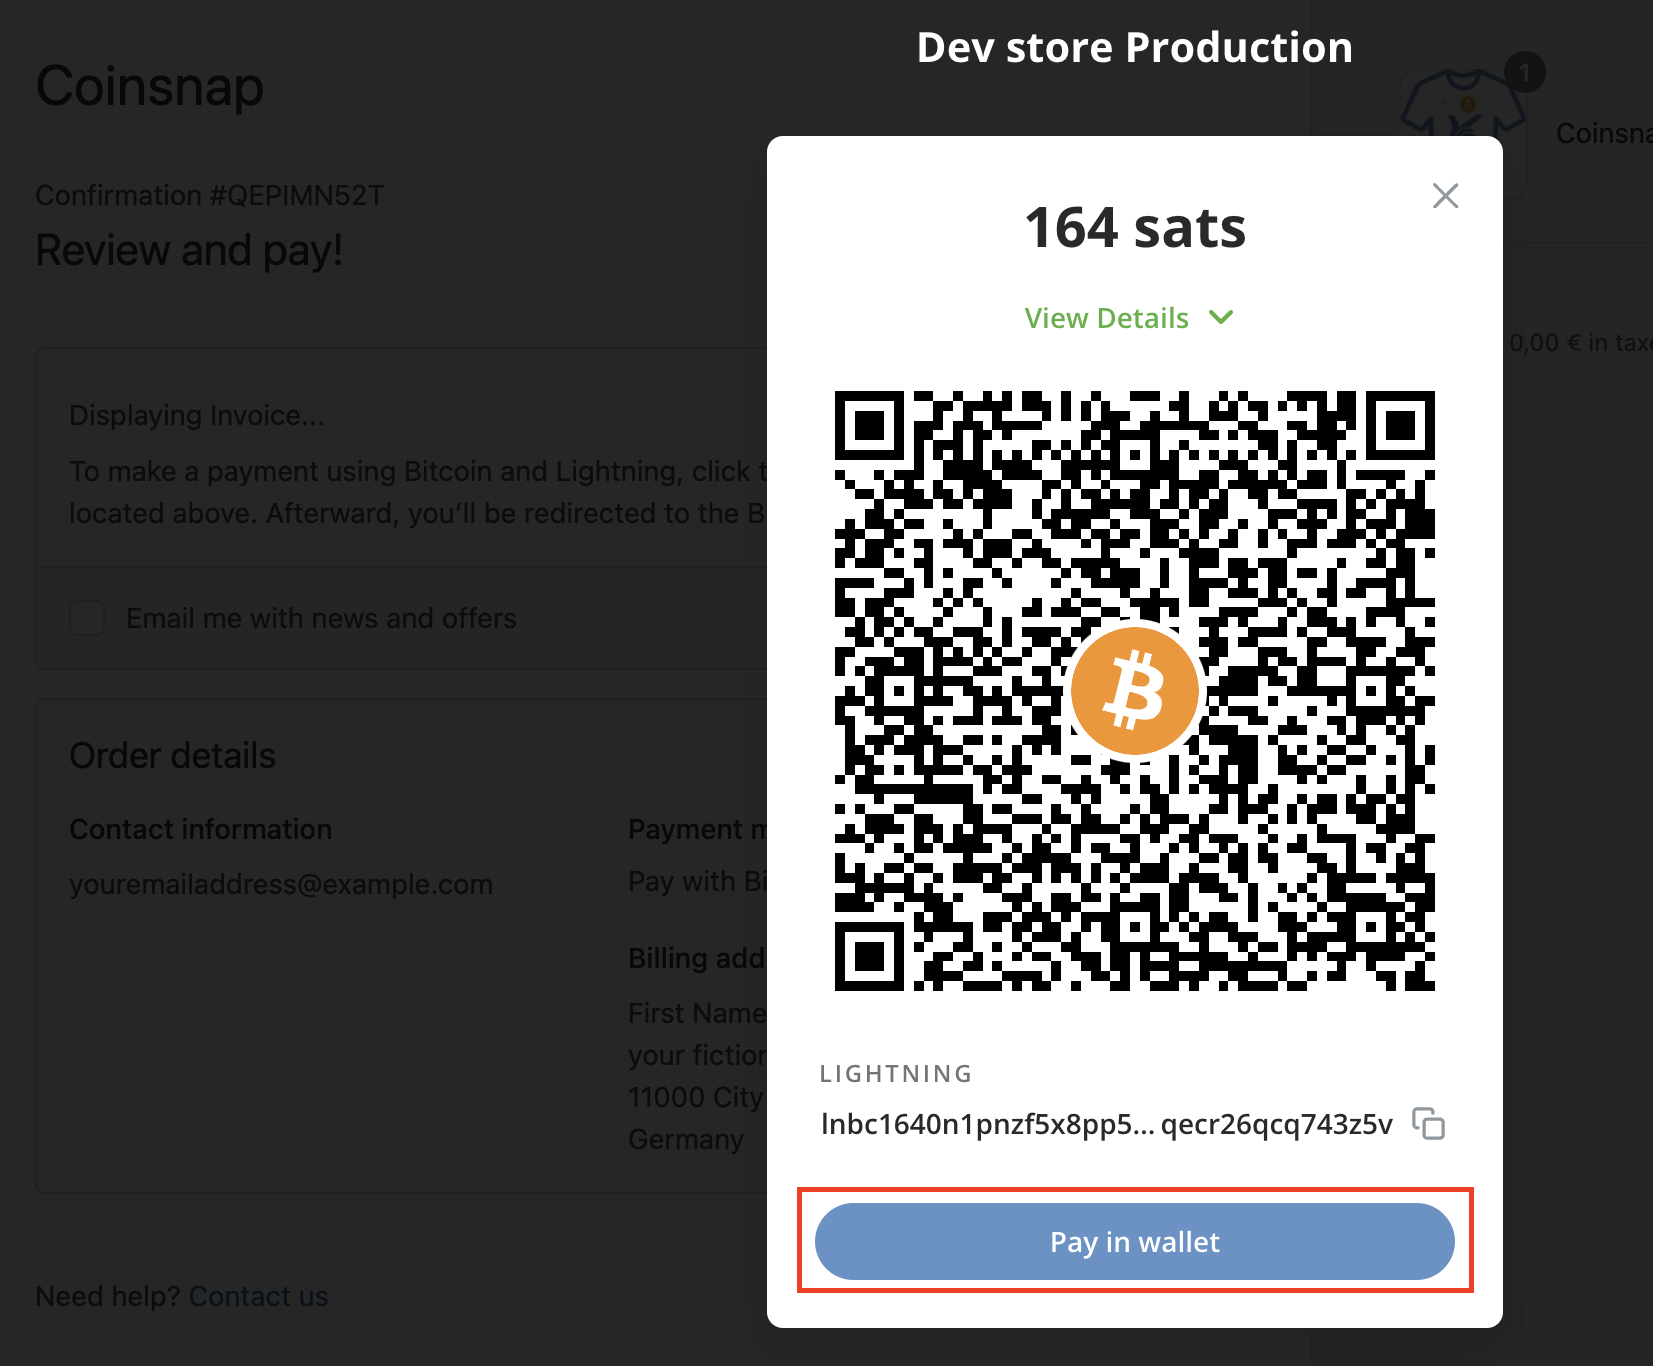
At the end you will receive a QR code that you should scan with your wallet to pay with Coinsnap Bitcoin and Lighhtning!
Set up Coinsnap in your Shopify store system
The Shopify integration of Coinsnap consists of three parts:
1. Setting up the Shopify backend:
Create, install, and manage credentials in the Shopify backend.
2. Linking Shopify with Coinsnap:
Adding admin API access token and API key from Shopify to Coinsnap.
3. Configure the Shopify checkout and payment settings:
Shopify checkout and payment settings
Set up Coinsnap on Shopify
Once registered on Coinsnap, you can log into your Shopify store and access the Shopify backend.
If you have not yet set up your Coinsnap account, you can create it via this link.
If you are accessing the Shopify backend, go to.
(1) “Settings” > (2) “Apps und Sales channels” > (3) “Develop apps”.
On the app’s main page, under the “Overview” tab, select “Configure Admin API Scopes” (highlighted by a red rectangle in the image).
In the “Filter Admin Access Scopes” field, input “Orders” or simply scroll down to the “Orders” section.
(1) Install App
Click “Install App” located at the top right corner.
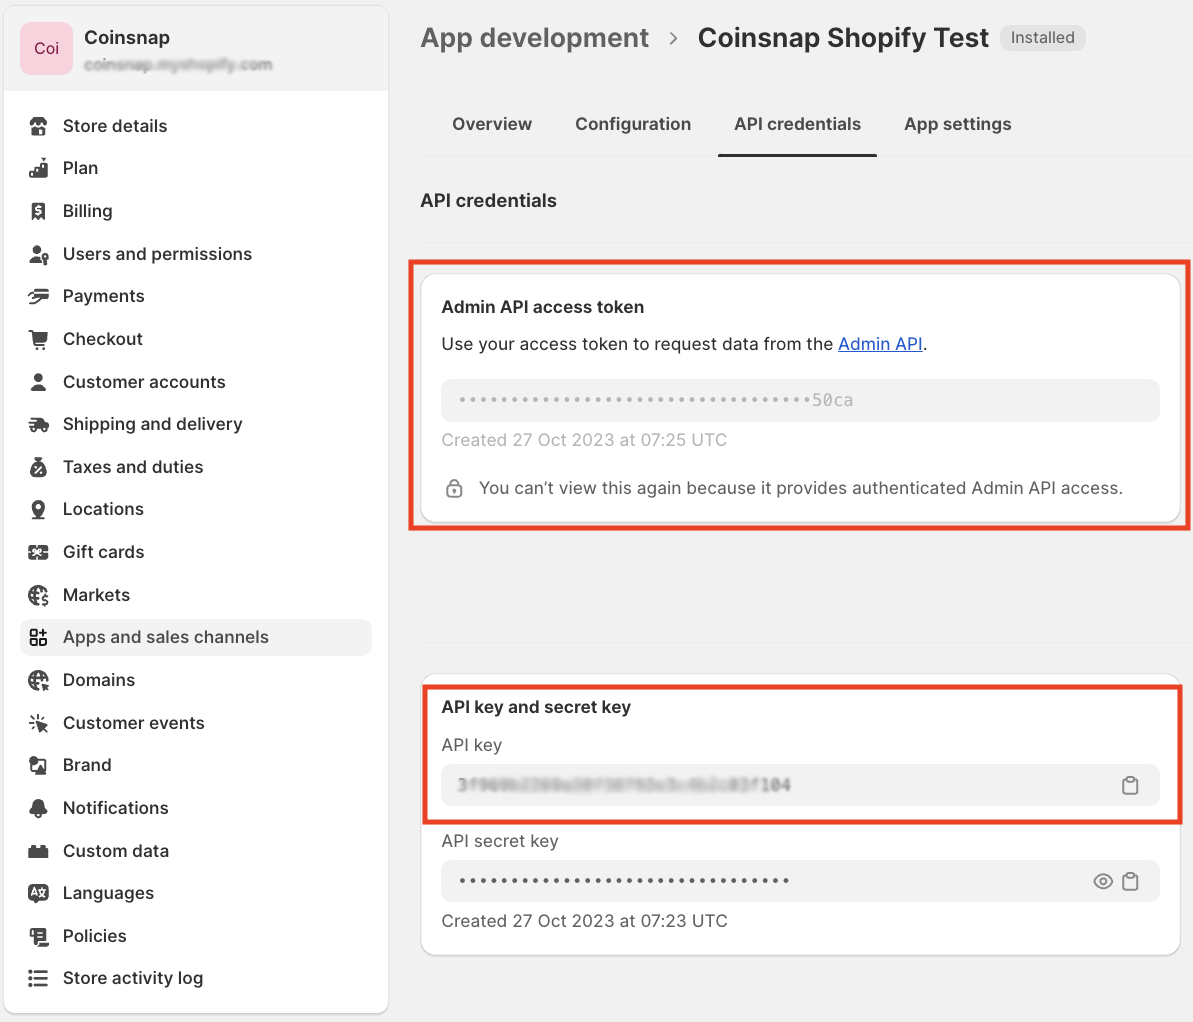
Once the pop-up window appears, select “Install.” Following this, reveal the Admin API access token and copy it.
Coinsnap Shopify Settings
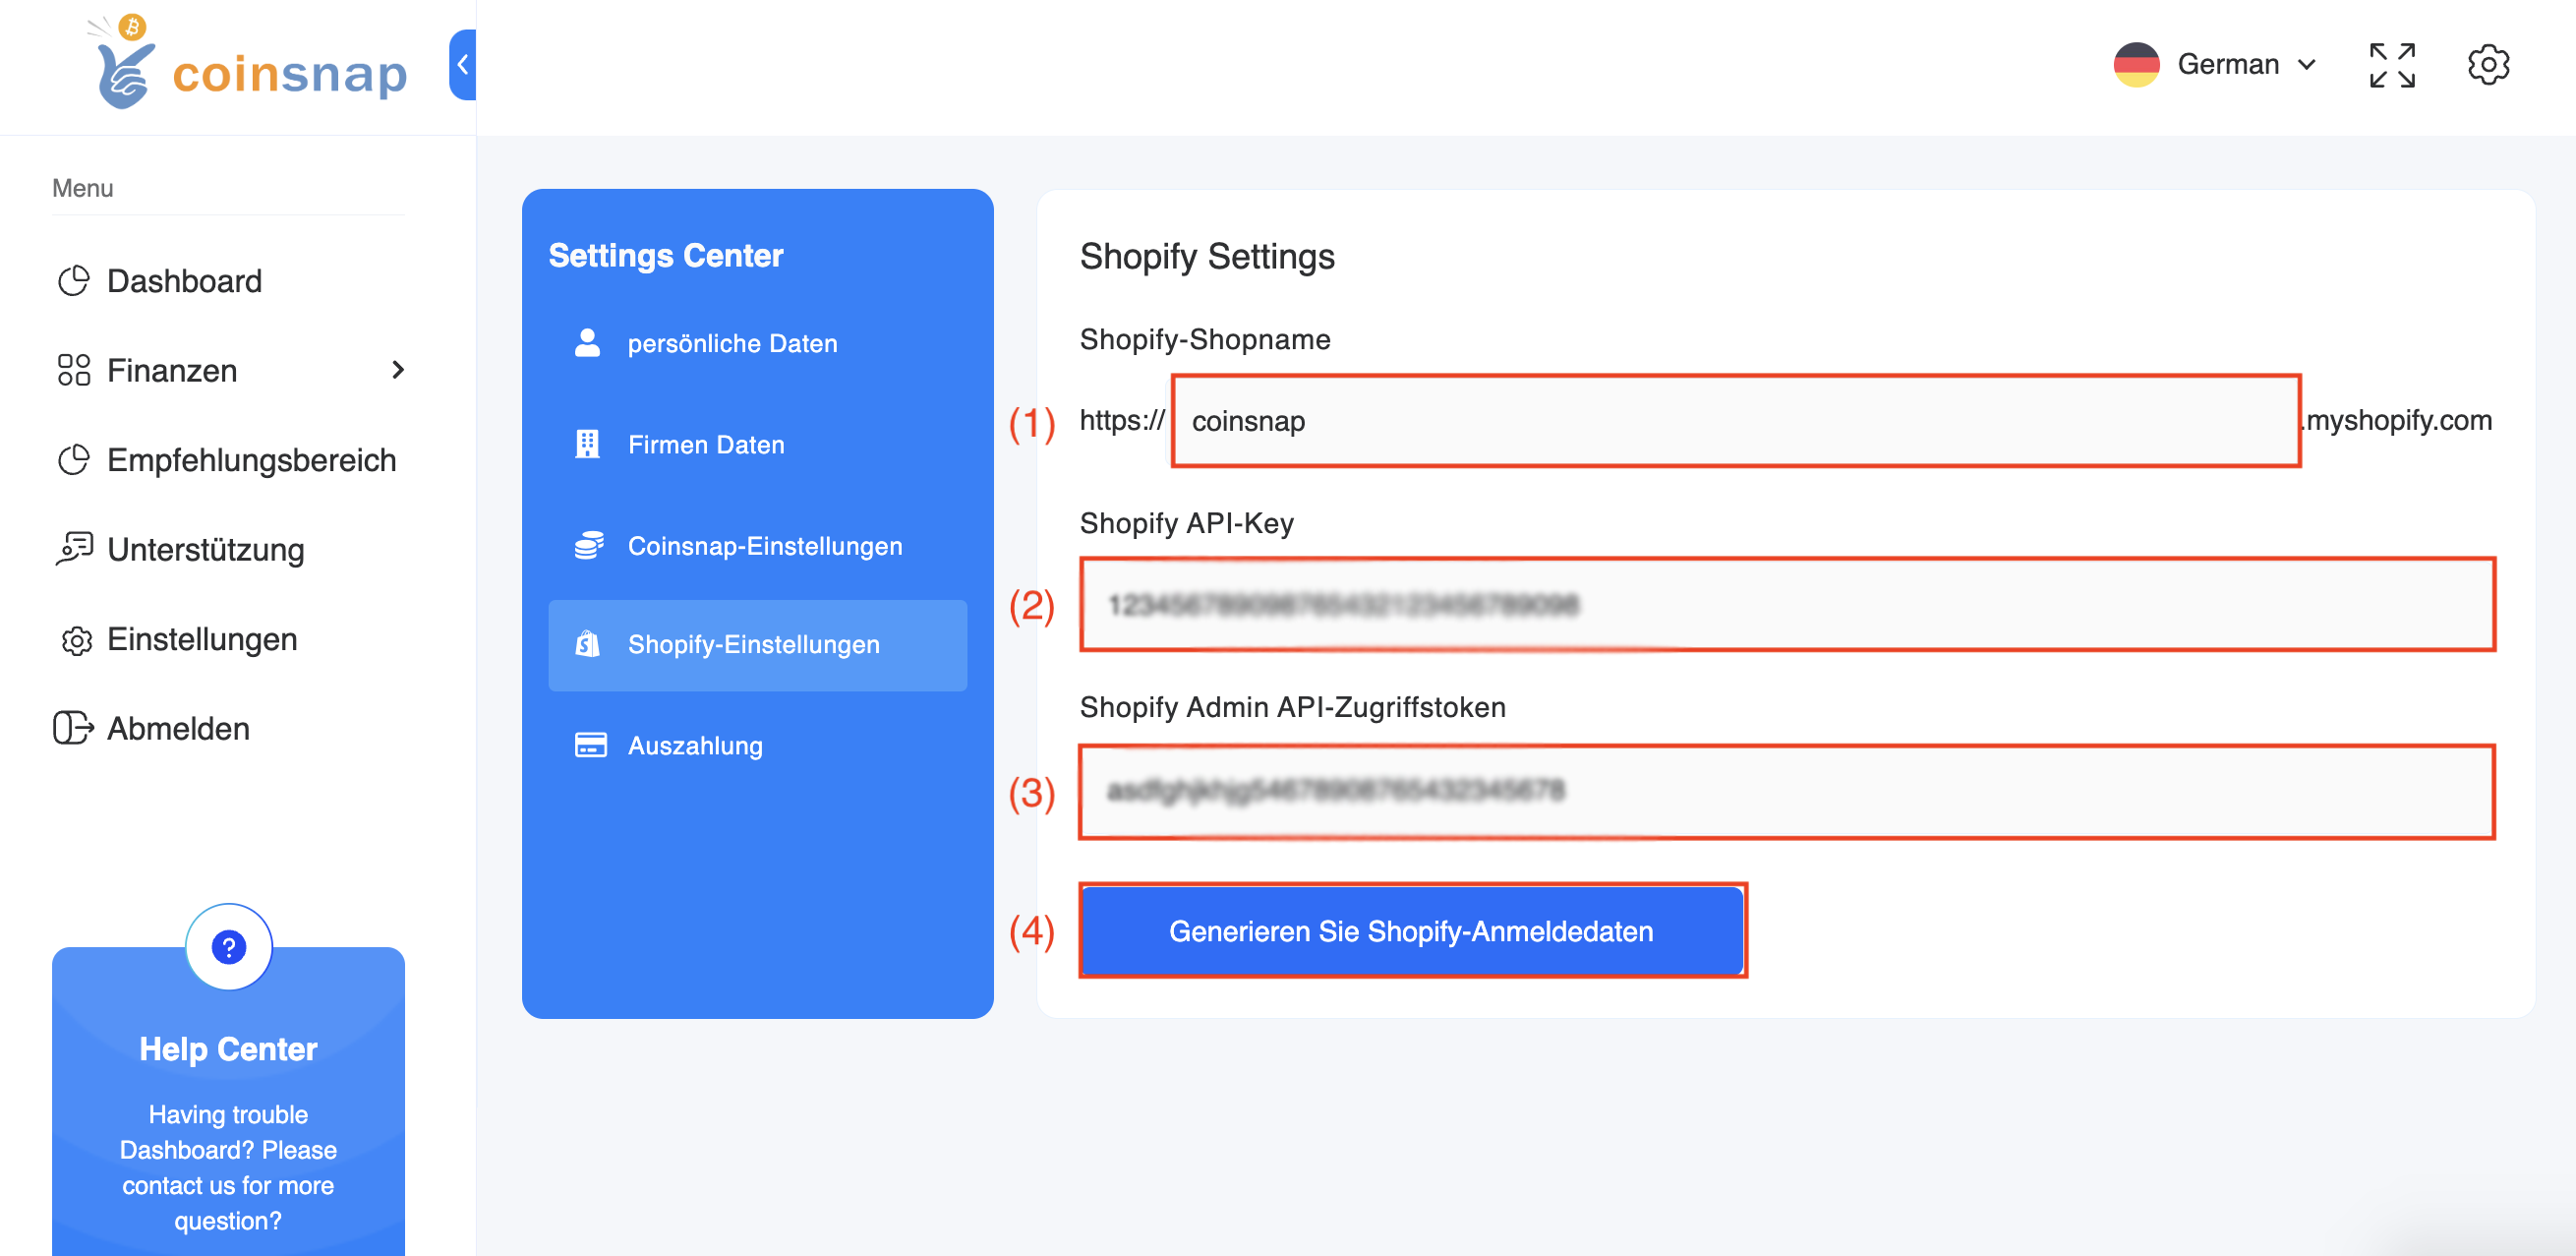
Within the Coinsnap app (app.coinsnap.io), navigate to “Settings” > “Shopify Settings.”
(2) Shopify API Key
For the “Shopify API Key” field, paste the corresponding API key you obtained from Shopify.
(3) Shopify Admin API Access Token
In the “Shopify Admin API Access Token” field, paste the Admin API access token sourced from Shopify.
(4) Generate Shopify Credentials
Press button “Generate Shopify Credentials” to get js-script code which you will provide to Shopify.
(1) Shopify store name
In the first field, enter your Shopify store name. When you need to enter the name of your store go to domain secction of Shopify and find version with “yourstorename.myshopify.com”. The name you see there you need to use on Coinsnap App.

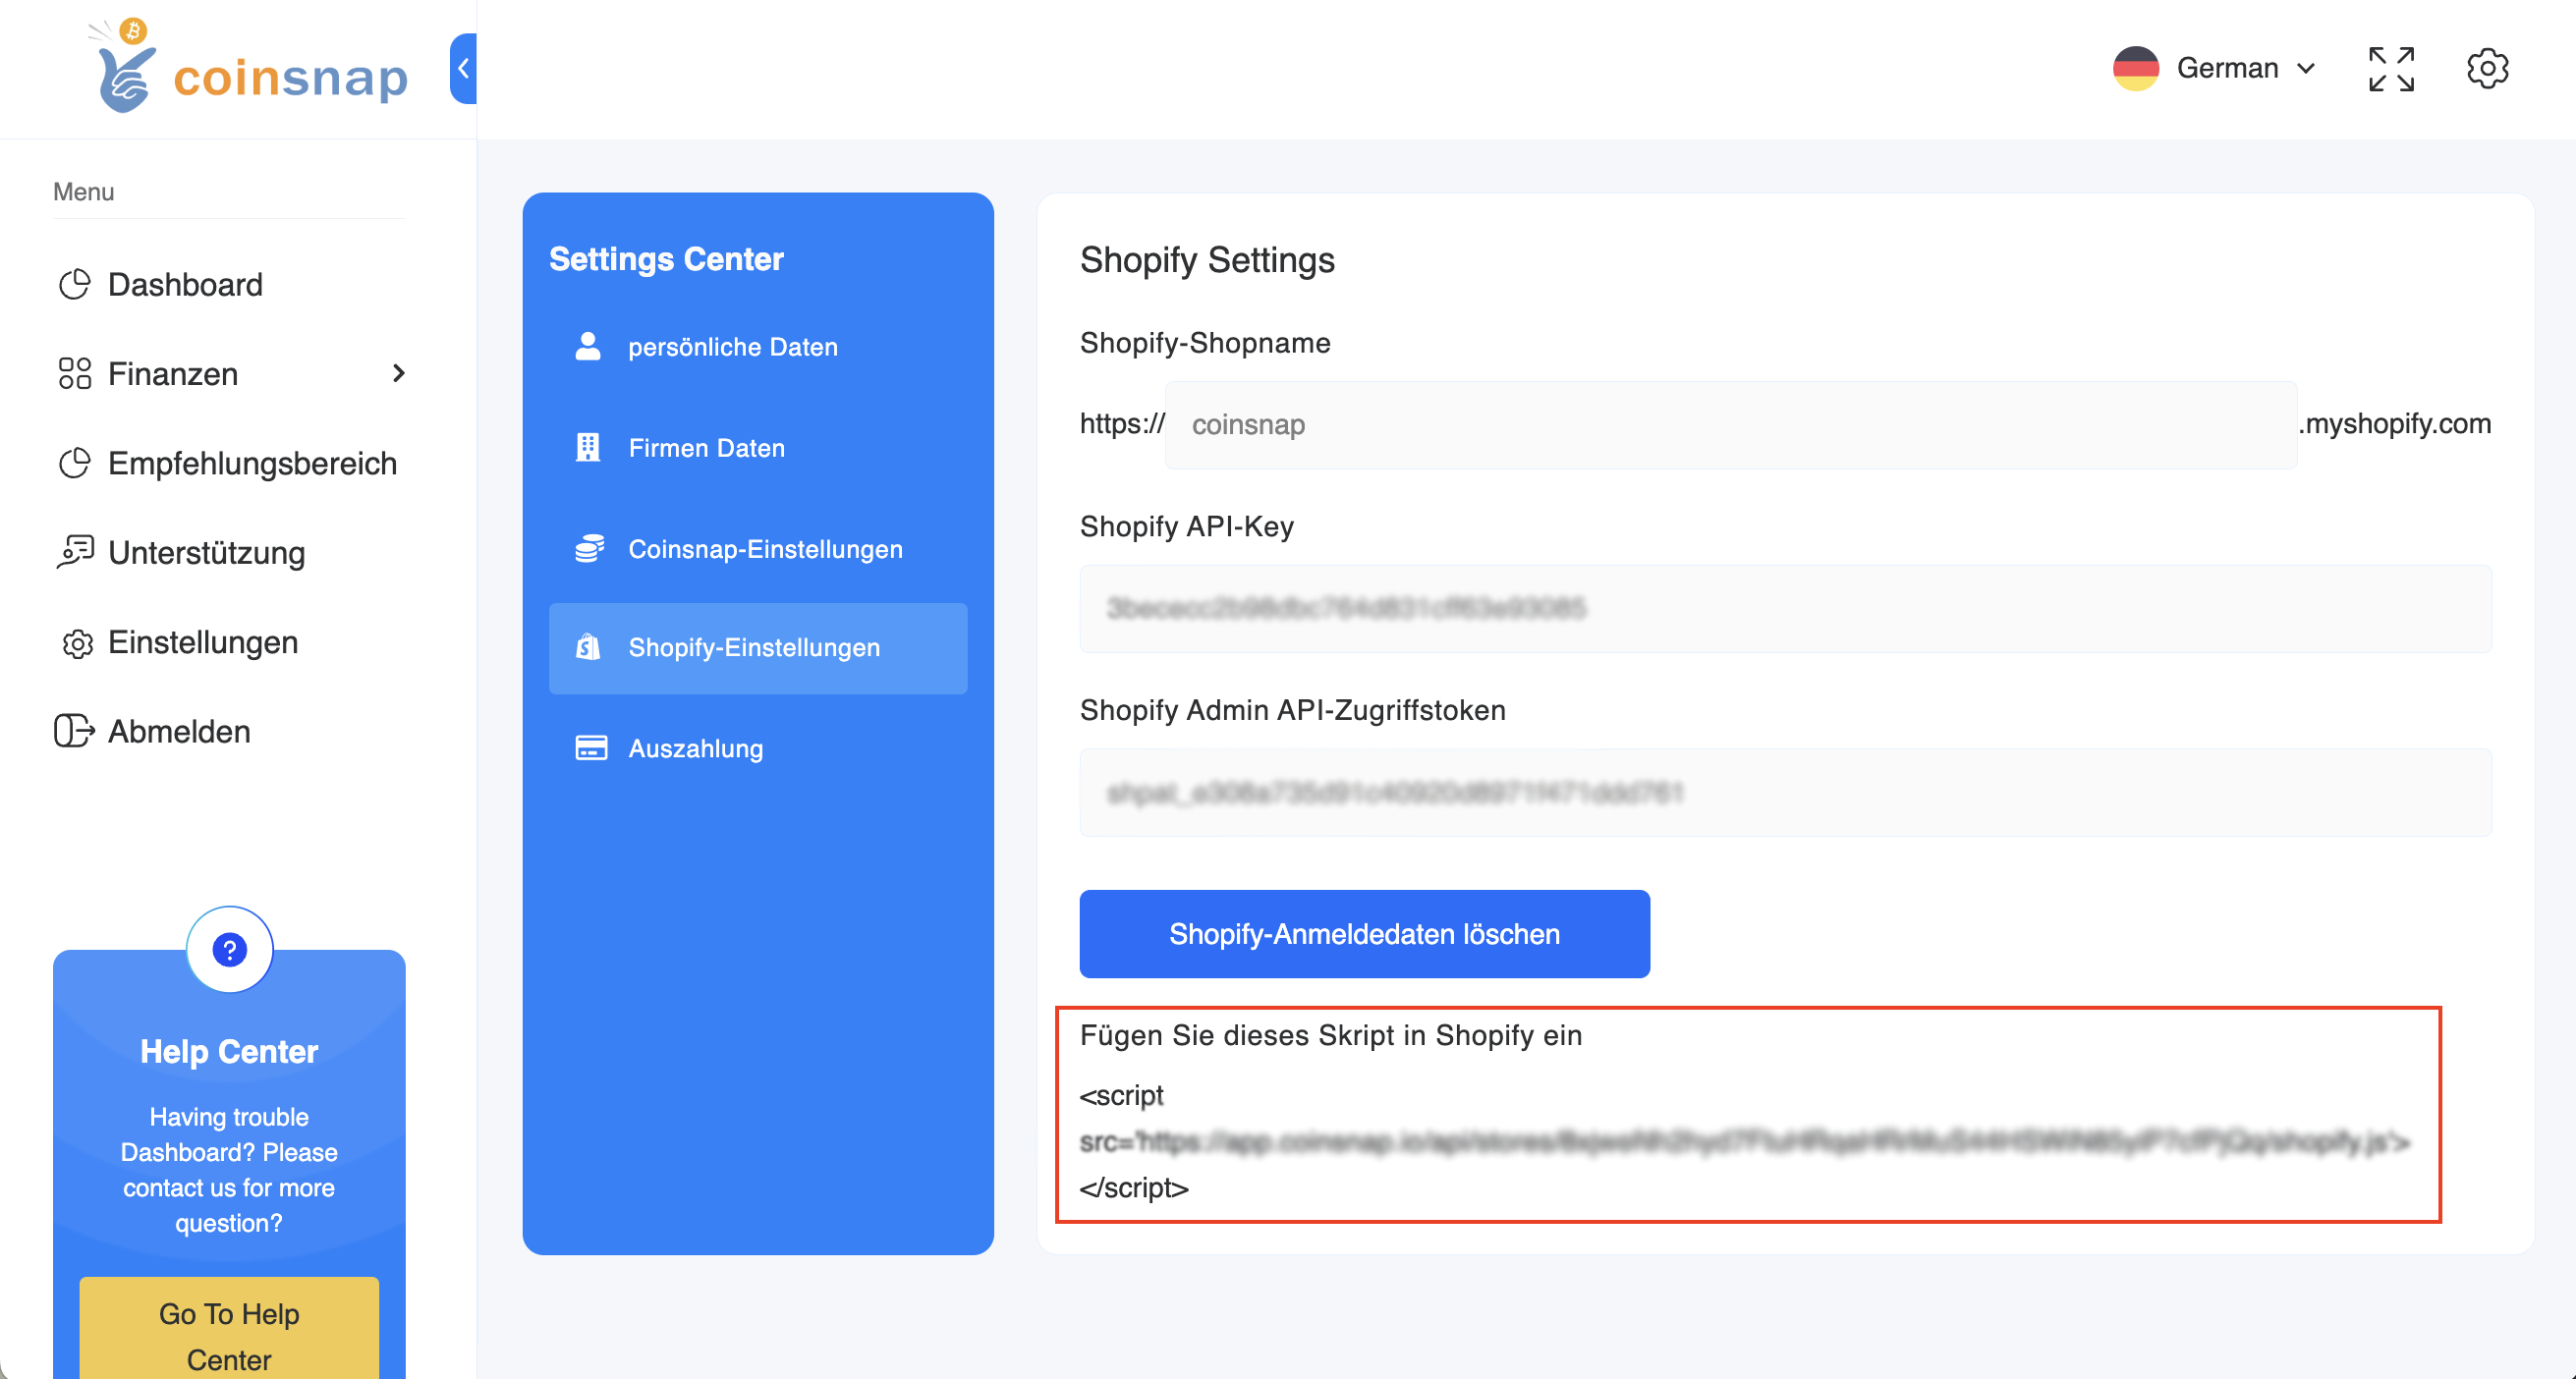
Upon selecting “Generate Shopify Credentials,” a new field will appear.
Click on the “Paste this script in Shopify” field to copy the js-script code.
(You’ll know it’s copied when the background turns blue after clicking it with your mouse.)
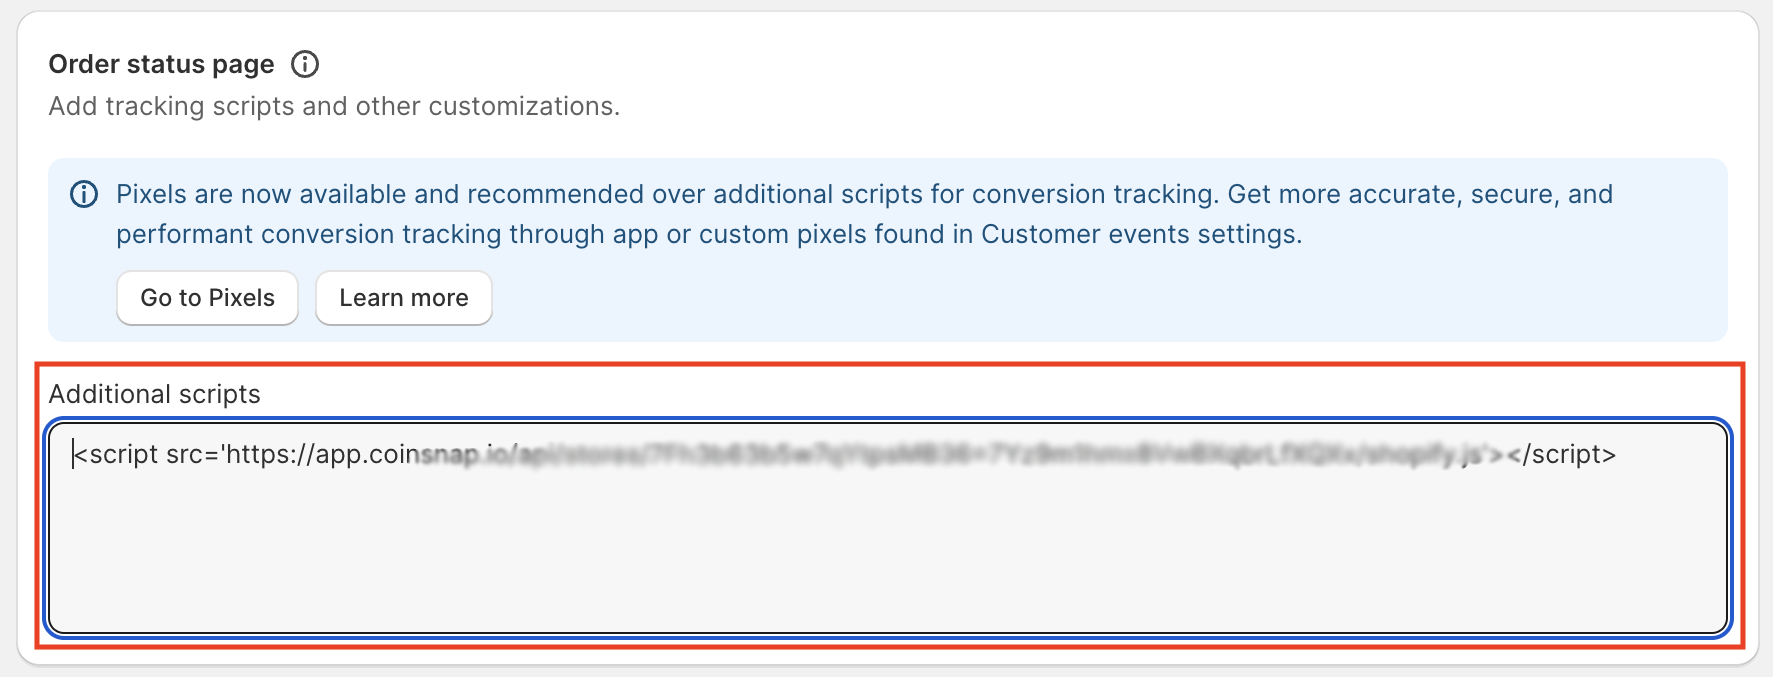
We then need to paste this script into the Shopify backend.
Shopify payment processing
Once you’ve gathered all the necessary information, return to Shopify.
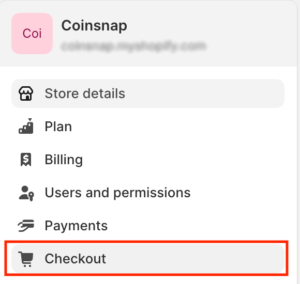
First, navigate to the “Checkout” section within Shopify’s Store Settings.
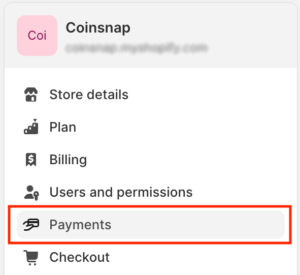
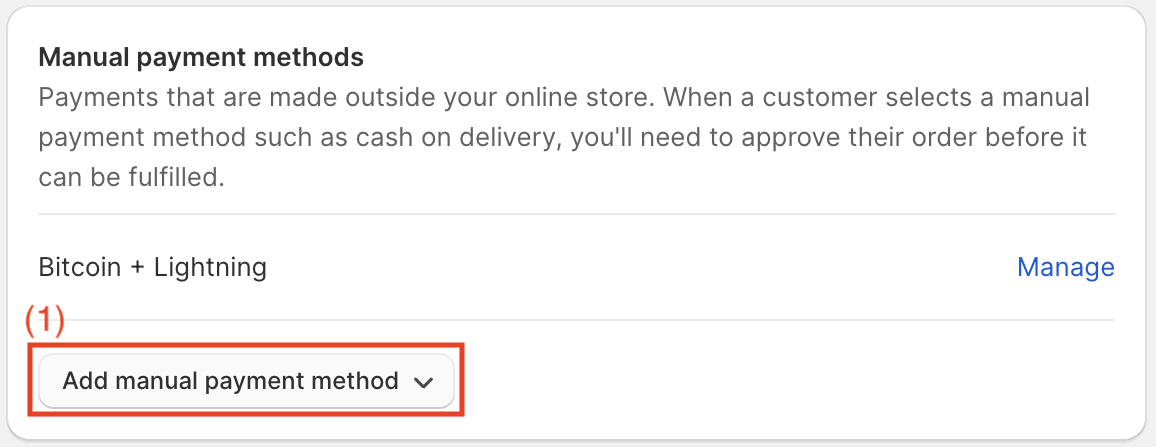
Navigate to the “Payments” section within Shopify’s Store Settings to allow Bitcoin and Lightning payments.
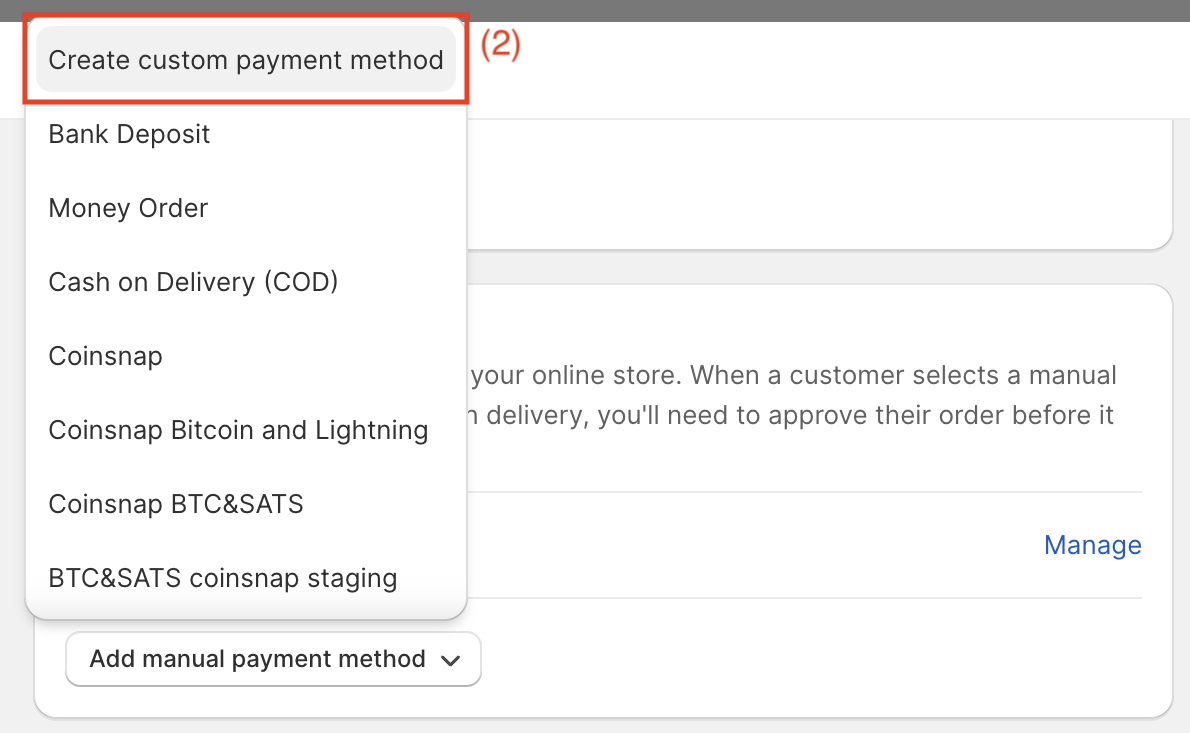
(2) Set Up a Custom Payment Method
Select “Create Custom Payment Method” to open a window.
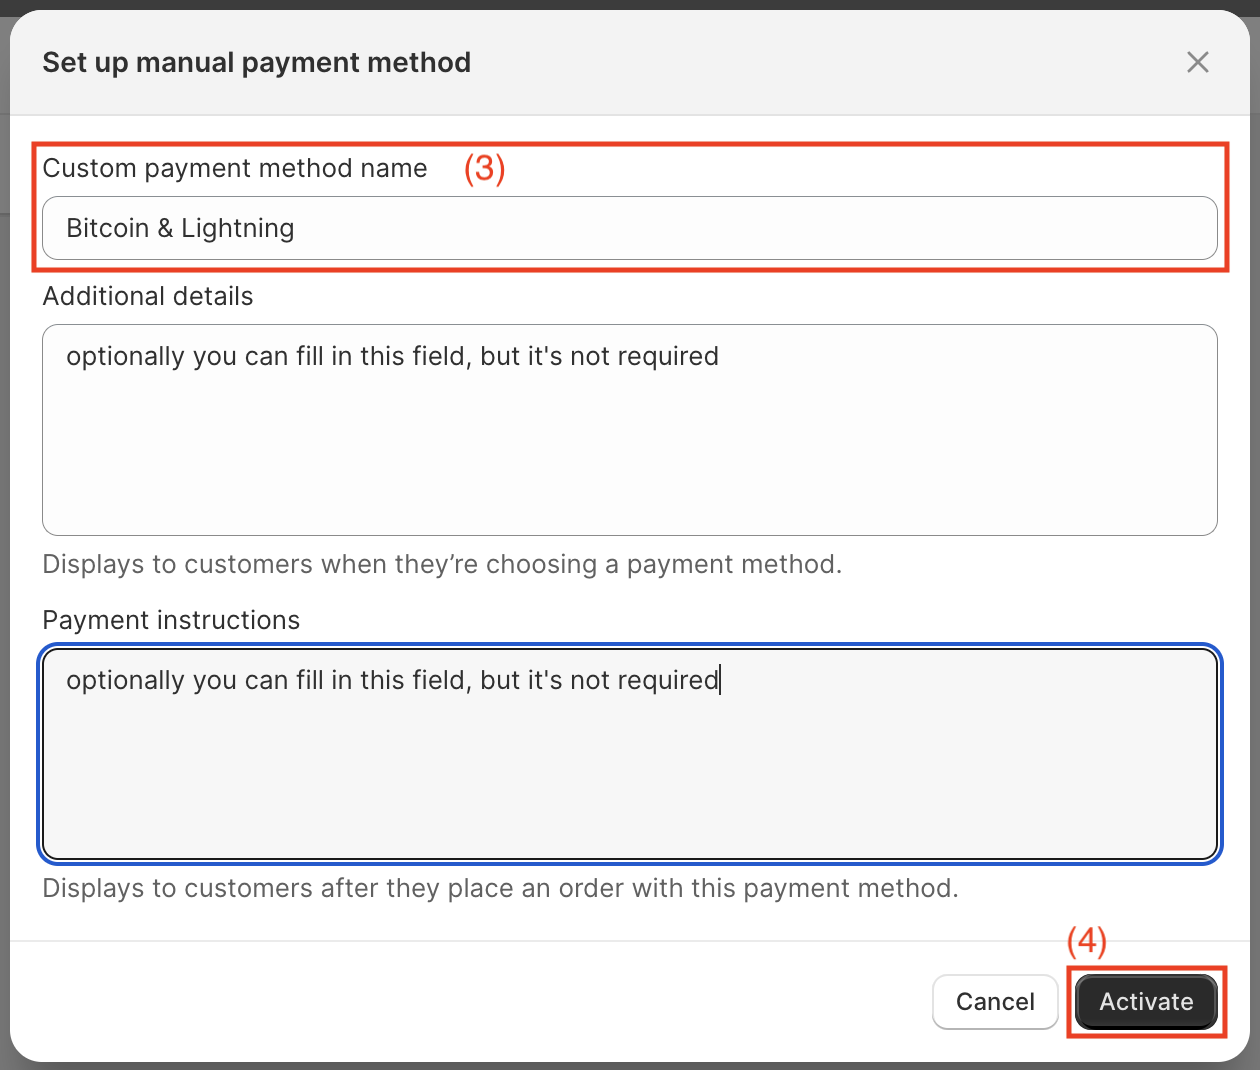
There, you’ll need to provide a name for your payment method and add any optional requirements.
(3) Custom Payment Method Name
Enter “Bitcoin + Lightning” in the “Custom payment method name” field. While there are other optional fields you can complete, they are not mandatory. You can choose the name freely, but you have to make sure that the name is Bitcoin. So you can write. “Pay with Bitcoin”, “Pay with Bitcoin and Lightning” or just “Bitcoin + Lightning”.
In the Payment Instructions field, you can now enter a text to be displayed to the payer.
For example:
“To make a payment using Bitcoin and Lightning, click the “Pay with Bitcoin” button located above. Afterward, you’ll be directed to the Bitcoin payment page. ” You will then be redirected to the Bitcoin payment page.”
(4) Activation
Finally, click the “Activate” button. You have now successfully set up and connected Shopify and Coinsnap.
Now you can place a test order and check if all functions work correctly.
Coinsnap integration on Shopify
You can also have Coinsnap payment processing integrated into your Shopify store by our partner company Coincharge.
The integration service is free of charge during the introductory phase.
You can find more information in the article Shopify Integration Service


